
Too little brush pressure leaves debris, oil, scale, or dust behind. Too much pressure can bend filaments permanently, mark a finished surface, overload a drive, and shorten brush life well before its expected service interval. This guide to brush pressure settings explains how maintenance teams, engineers, and OEMs can set contact correctly for industrial cleaning, conveying, sealing, deburring, and surface-treatment equipment.
Brush pressure is not a fixed number that applies to every machine. It is the controlled interference between the brush and the workpiece, conveyor, belt, panel, or surface being contacted. The correct setting depends on brush construction, filament material and diameter, rotational speed, surface condition, required finish, and how consistently the equipment holds its operating position.
Why Brush Pressure Settings Affect Production
An industrial brush works best when its filaments flex enough to confirm to the surface without being forced into excessive bending. That controlled flex is what creates effective wiping, sweeping, cleaning, polishing, or support. When the brush is set too aggressively, the contact zone becomes less predictable and wear accelerates at the filament tips.
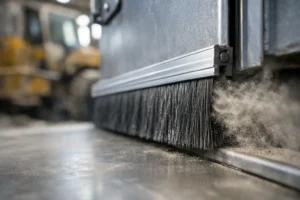
For a cylindrical or roller brush, excessive interference can increase motor load and heat while causing the brush to wear unevenly across its face. On sheet metal handling equipment, an overly compressed brush table panel may affect material support, scratch sensitive finishes, or create unnecessary drag as sheets move through the machine. With strip brushes used for sealing, too much compression can deform the fill and reduce the brush’s ability to recover and maintain a consistent seal.
Insufficient pressure has its own costs. A cleaning brush may miss low spots or fail to remove fine debris. A dust-control strip brush may leave gaps along an enclosure or conveyor. A wheel brush may polish inconsistently because it is only touching high points. The target is the lowest pressure that reliably performs the required task.
Start With the Application, Not a Pressure Guess
Before adjusting a brush, define what the brush is expected to do. Cleaning loose dust from a packaging conveyor requires a different contact condition than removing oxidation from steel, supporting formed sheet on a CNC punch press, or applying a controlled finish to glass or wood.
For light cleaning and dust removal, minimal interference is usually appropriate. The brush should make consistent contact, but the filaments should not be heavily deflected. This protects both the brush and the substrate, especially on coated, painted, polished, or food-contact surfaces.
For more demanding cleaning, deburring, or surface conditioning, pressure may need to increase gradually. Abrasive nylon brushes, for example, require enough contact to expose cutting action, but extra pressure does not automatically improve results. When abrasive filaments are over-flexed, they can generate heat, wear rapidly, and produce an uneven finish. In many applications, adjusting speed, feed rate, or brush density is more effective than simply increasing pressure.
Brush tables and brush panels require another approach. Their purpose is commonly to support, protect, and guide material rather than abrade it. Height consistency across the panel is critical. A few high brushes can create drag or witness marks, while low or worn sections may allow material to sag, shift, or contact exposed table components.
How to Set Industrial Brush Pressure Step by Step
Begin with the equipment stopped and secured according to plant lockout procedures. Inspect the brush for uneven wear, missing fill, bent channels, core damage, loose hubs, or accumulated contamination. A pressure adjustment cannot correct a brush that has already lost its working profile.
Set the brush at the manufacturer’s baseline position or at the known machine reference point. If no documented setting is available, begin with light contact. For rotary brushes, this generally means a small, measurable interference rather than forcing a deep brush face into the work surface. For strip brushes, start with enough compression to close the intended gap while allowing filaments to retain their natural spring.
Run a controlled test using representative material and normal production conditions. Watch the actual result rather than relying only on appearance at idle speed. Check cleaning coverage, finish quality, material tracking, dust containment, drive load, noise, and heat. On a brush table, move the normal sheet size and thickness across the working area to confirm that it is supported without excessive resistance.
Increase contact in small increments only when the outcome does not meet requirements. Record each adjustment and its effect. This makes the setting repeatable across shifts and helps identify whether a declining result is caused by pressure, brush wear, contamination, or a change in incoming material.
Measure What the Machine Can Repeat
A good setting must be repeatable, not dependent on an operator’s visual estimate. Use machine scales, adjustment screws, spacer dimensions, actuator positions, or documented gap measurements whenever possible. For critical surface applications, production teams may also monitor amperage, line speed, roughness, cleaning results, or defect rates.
The measured reference depends on brush type. Roller and cylindrical brushes are often set by brush diameter, centerline position, and interference with the work surface. Strip brushes may be set by compressed trim length or gap closure. Brush panels are typically checked for installed height, flatness, and uniformity relative to surrounding support surfaces.
Document the brush part number, installed dimensions, setting reference, operating speed, material being processed, and date. This information is especially useful when replacement and custom brush solutions are sourced for multiple machines or facilities.
Signs Your Brush Pressure Is Too High
Overpressure is often mistaken for a worn brush because both conditions can reduce performance. The difference is in the evidence. A brush set too low or too deeply into the work commonly shows flattened or permanently splayed filaments, concentrated wear bands, rising motor load, and excessive heat near the contact area.
Surface damage is another warning sign. Look for scratches, directional marks, excessive polishing, coating removal, or deformation of soft material. In food processing and packaging, high pressure can also make sanitation more difficult by trapping product residue within compressed filaments.
Noise and vibration deserve attention as well. A rotary brush that is forced into contact may chatter, especially if the workpiece varies in thickness or the brush core has runout. Reducing interference can stabilize the process, but recurring vibration may also point to balance, bearing, alignment, or drive issues.
Signs the Setting Is Too Light
A light setting is not always a problem. For protective brush tables, guiding brushes, and delicate surfaces, it may be exactly right. It becomes a problem when the required outcome is inconsistent.
Common indicators include debris left along edges, incomplete cleaning in recessed areas, dust escaping around a strip-brush seal, inconsistent surface finish, or sheets shifting where brushes are intended to guide or support them. On cylindrical cleaning brushes, narrow untouched bands may indicate low pressure, but they can also result from brush runout, poor alignment, or a worn diameter.
Do not compensate automatically by adding more pressure. First verify brush material, trim length, density, rotation direction, machine alignment, and process speed. A brush with the wrong filament stiffness or an incorrect outside diameter may never perform properly, even under heavy contact.
Material and Design Change the Correct Setting
Nylon, polypropylene, steel wire, stainless steel wire, horsehair, Tampico, and abrasive nylon all respond differently under load. Larger filament diameters and stiffer materials generally need less deflection to generate contact force. Fine, flexible filaments may need more controlled interference to reach contours, but they can also fatigue quickly if compressed beyond their working range.
Brush density matters. A dense brush can distribute contact over more filaments and may require a lighter setting than a sparse brush performing the same task. Core type, trim length, filament pattern, and brush diameter also affect how the brush reacts in service.
This is why replacement brushes should match more than overall length and diameter. For OEM equipment, machine measurements and process conditions should guide the specification. A custom-engineered industrial brush solution can account for the substrate, contamination, temperature, moisture, chemical exposure, line speed, and required service life instead of forcing a generic brush into an unsuitable setting.
Brush Pressure Settings for Common Industrial Uses
For conveyor cleaning, set pressure only high enough to clear the belt or product path without increasing drag or transferring debris. For sealing applications, adjust strip brushes to maintain contact through expected vibration and part variation, while avoiding crushed filaments that lose recovery.
For CNC punch press brush panels, ensure the installed brushes provide uniform support across the working table. The concern is usually not aggressive pressure but consistent panel height, correct brush density, and material protection. Replacement brush panels should be manufactured to the machine’s exact dimensions and configuration, including applications for Amada, TRUMPF, Salvagnini, Prima Power, Murata, Finn-Power, LVD, and similar equipment.
For abrasive finishing, test pressure alongside rotational speed and feed rate. A lower-pressure, properly specified abrasive nylon brush running under stable conditions may provide a more uniform result and longer life than a harder setting with a more aggressive brush.
FAQs About Industrial Brush Pressure
How often should brush pressure be checked?
Check it at installation, after the first production run, and whenever material, speed, finish requirements, or brush type changes. Include pressure verification in routine preventive maintenance for high-use equipment.
Should pressure increase as a brush wears?
Usually, yes, but only in controlled increments. As trim length and brush diameter decrease, the brush may need repositioning to maintain contact. If adjustment becomes excessive, replace the brush rather than running it beyond its effective working profile.
Can a custom brush reduce pressure-related problems?
Yes. Correct filament material, trim length, density, core construction, and dimensions make it easier to run at a stable, moderate setting. This reduces premature wear and helps maintain consistent production results.
Need a custom industrial brush solution? Cepillos Regios manufactures replacement and custom brush solutions for production equipment based on your machine, dimensions, material, and application. A documented pressure target, paired with a brush designed for the actual job, gives your team a practical way to protect equipment and keep the line moving.